

Best Rapid Prototyping Service Solutions for Turning Ideas into Reality
2026-08-16
Turning an idea into a physical prototype shouldn’t feel like a leap of faith. Yet many teams waste weeks juggling slow quotes, unclear feedback, and one-size-fits-all processes. ProtoMat flips that script with rapid prototyping services built for speed, clarity, and real engineering insight. In this guide, we break down the key qualities that separate game-changing prototyping partners from the rest—so you can move from concept to confident iteration faster than ever.
Prototype Materials That Actually Hold Up to Real-World Use
Many engineers remain skeptical of prototype materials until they survive real-world abuse. But a handful of recent formulations are quietly proving that lab performance can translate into field reliability.
Take the case of a new polymer blend reinforced with short glass fibers. After twelve months inside a vibrating industrial pump, its surface showed only superficial scuffing, while the standard nylon component it replaced had already cracked twice.
What sets these materials apart is rarely a single breakthrough. It is the cumulative effect of small adjustments—a slightly different curing temperature, a sacrificial bond here, a denser crosslink there. Together, they create prototypes that hold up not just on a test bench, but in the messy, unpredictable conditions of actual use.
The Trade-Offs Behind a 48-Hour Prototype Turnaround
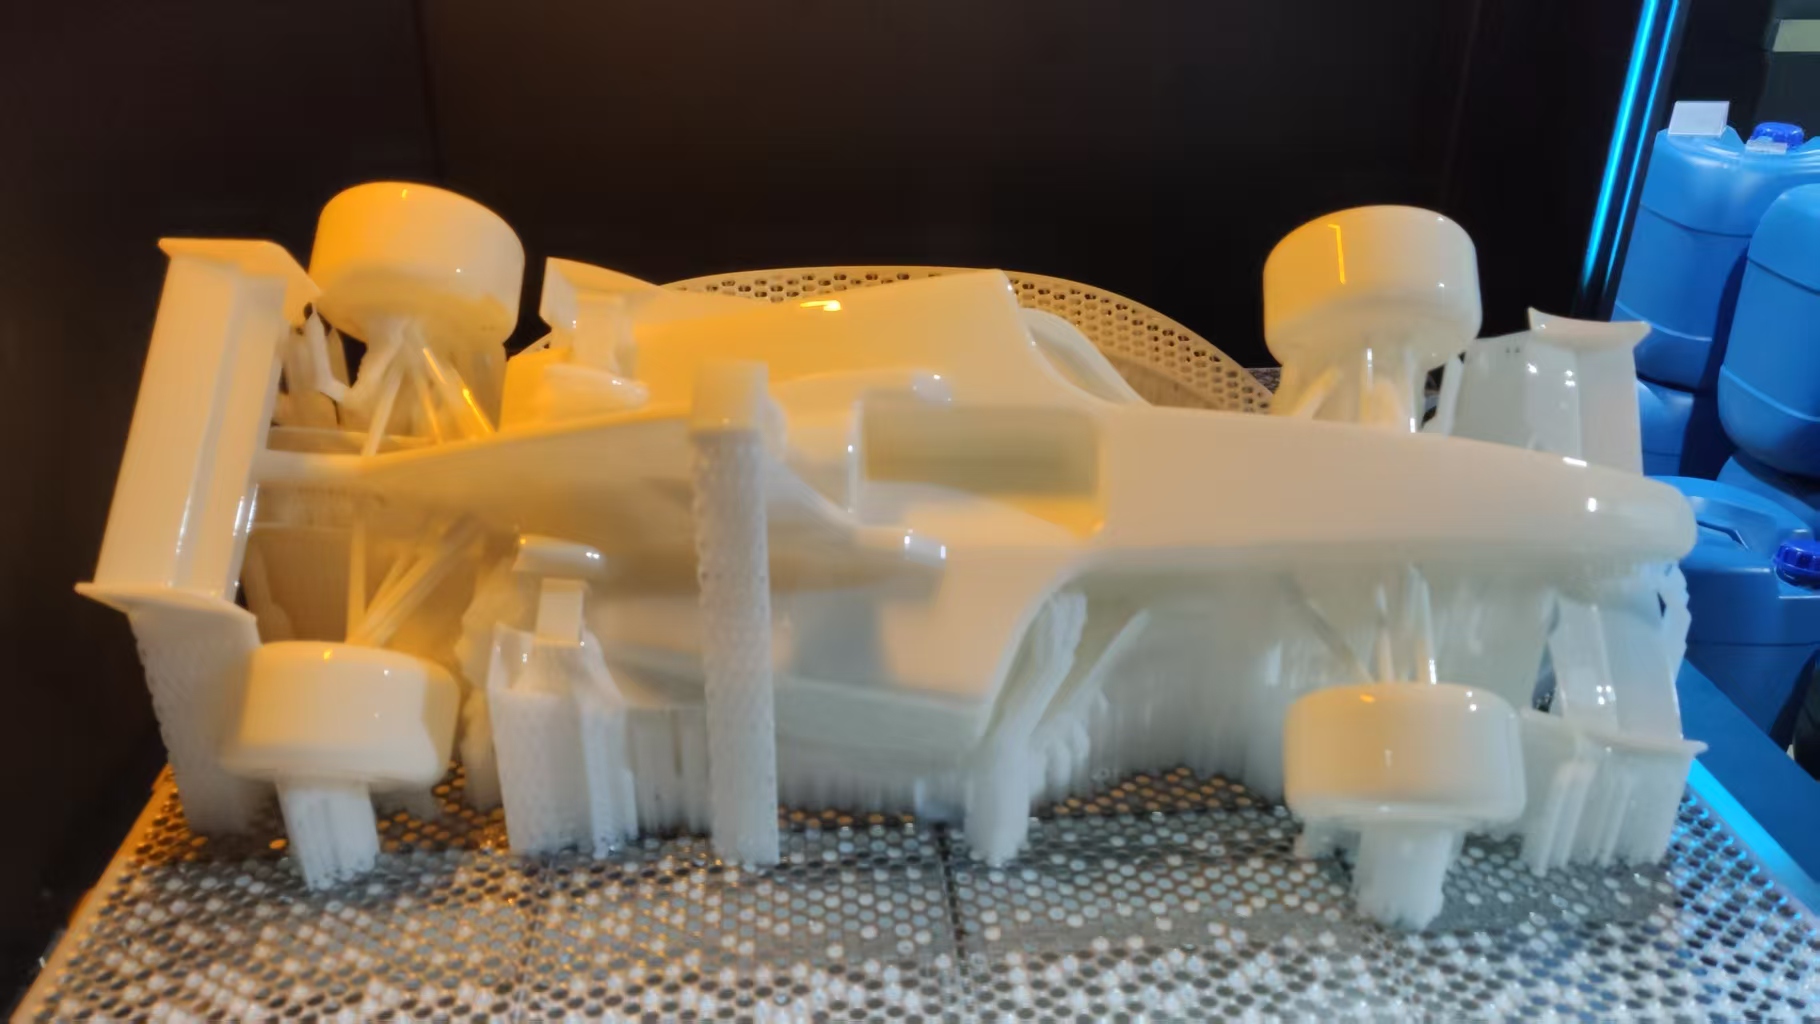
A 48-hour sprint forces an immediate triage. You stop asking what the product could become and start asking what can be faked or hardcoded right now. That shift feels liberating because it kills the perfectionist loop, but it quietly narrows the problem space. Features needing real data, edge-case handling, or a slower design pass get shelved, and some never return to the roadmap.
The less visible trade-off is cognitive. Two days of relentless building leaves almost no room for the idle thinking that catches flawed assumptions. Teams often ship a demo that looks alive but rests on brittle guesses, and the effort to unwind those guesses later rarely shows up in the plan. Speed is not the problem; the cost is simply deferred, not removed.
There is also a human toll. At kickoff, 48 hours sounds energizing, but by hour 30 people make worse decisions just to close tickets. Small disagreements get buried because there is no time to argue. That can produce a prototype the team does not fully trust, even when stakeholders praise it. The deepest trade-off is not only what gets built, but what the team decides not to question while building it.
Where Prototype Budgets Leak and How to Plug Them
Money doesn't vanish in a single dramatic moment—it drains away through a dozen small, almost invisible decisions. The most damaging leaks often start with feature enthusiasm. A team agrees to build a simple login flow, but by the next standup someone has added social sign-in, password recovery, and two-factor authentication. Each addition feels reasonable on its own. Nobody notices the cumulative cost until the sprint review reveals you've spent three weeks on what was supposed to be a two-day task. The plug here is embarrassingly simple: write down the exact scope before any coding begins, and treat any addition as a new line item that requires cutting something else.
Another quiet sinkhole is the quest for visual perfection too early. Prototypes are meant to test assumptions, not win design awards. Yet teams routinely burn days adjusting drop shadows, tweaking button radii, and swapping fonts while the core interaction remains completely unvalidated. A better approach is to start with deliberately rough edges—paper sketches, grayscale wireframes, even a flowchart on a whiteboard. Force yourself to ask: will this visual polish change how a user understands the flow? If the answer is no, skip it. You can always make things pretty later, once you know the bones are sound.
Finally, watch out for the endless feedback loop disguised as collaboration. When you invite five stakeholders into a Figma file with comment access, you don't get better decisions—you get a design-by-committee mess. Each person adds a note, then someone responds to that note, then the original commenter edits their suggestion, and suddenly your team spends afternoons interpreting threaded discussions instead of building. Plug this by limiting feedback rounds to a fixed number—say two—and only from people who will actually use the prototype or pay for it. Anything else is just noise with a pleasant interface.
Deciding Between 3D Printing and CNC Machining for Your Build
The first thing that usually tips the scale is geometry. If your part has internal channels, lattice structures, or organic curves that would be impossible to reach with a cutting tool, 3D printing is the only sensible route. CNC machining, on the other hand, excels when you need sharp internal corners, tight bores, or parts that must fit together with very little play.
Material choice often drives the decision more than people expect. CNC gives you access to a huge range of metals and engineering plastics with predictable, isotropic properties, which matters if your build will see real loads or temperature swings. Printed parts have come a long way, but layer adhesion and anisotropic strength still make them a riskier choice for structural components unless you're using high-end industrial machines.
Then there's the practical side: how many you need and how fast. For one-off prototypes or a handful of iterations, 3D printing avoids fixture setup and toolpath programming overhead. But once you cross into a few dozen parts, CNC's repeatability and faster per-unit cycle times often win, especially if you need post-machining finishes or threaded features that printing simply can't deliver cleanly.
Small Design Tweaks That Prevent Prototype Delays
One of the easiest ways to avoid prototype delays is to lock down spacing and sizing before you start assembling screens. When every button, input, and card shares the same padding and height, handoff to developers becomes a matter of copying values instead of negotiating them. Even a quick pass to align corner radii and border widths can save a full day of back-and-forth later.
Resist the urge to build a custom interaction for every state early on. Prototypes often stall when a simple dropdown gets three unique animations, each needing its own timing curve and easing review. Pick one or two critical moments, like the main navigation transition or a primary button press, and keep everything else to standard fades and slides until the core flow is validated.
Keep your component set lean at the prototype stage. Creating dozens of variants for cards, chips, and toggles before you know which ones will survive testing only multiplies the work when a change ripples through. Instead, define a default and a hover or active state for each essential component, then expand the system once the prototype has proven what actually needs to exist.
Moving from Prototype to Production Without Costly Rework
The gap between a working prototype and a production-ready system often hides in the details nobody wants to revisit: hand-tuned parameters that only work on sample data, missing error handling for edge cases, and assumptions about resource limits that fall apart under real traffic. Teams that treat the prototype as a rough draft rather than a foundation tend to discover these issues late, when fixing them means rewriting core logic instead of adjusting a few settings.
One practical way to avoid that rework is to introduce production constraints early, even if they feel unnecessary during demos. Run the prototype against messy inputs, simulate partial failures, and measure how it behaves when memory or latency budgets are tight. These small stress tests cost little during development but expose architectural choices that would otherwise become expensive surprises after launch.
It also helps to separate what the prototype proves from what production actually requires. A quick script that stitches together libraries can validate an idea, but promoting it directly often means inheriting shortcuts that were never meant to last. Taking a short pause to map data flows, identify single points of failure, and document the assumptions baked into the code can turn a fragile demo into a stable starting point without rebuilding from scratch.
FAQ
Look for shops that ask about the end use before quoting. A good partner will push back on geometry that will fail in molding, suggest alternative materials for functional testing, and walk you through why a 0.5mm wall thickness might save money now but ruin your fit test later. If they only talk about machine specs and delivery dates, they are not thinking about your product's lifecycle.
For simple enclosures or brackets, 24 to 48 hours is common if you upload a clean CAD file. More complex assemblies with moving parts or overmolding can take 5 to 7 business days. The biggest bottleneck is usually file preparation, not machining or printing. Spending an hour simplifying draft angles and avoiding tiny unsupported features saves more time than paying for expedited shipping.
PolyJet or SLA parts with multiple shore hardness options come closest to production-like textures. If you need something closer to injection-molded polypropylene, a silicone mold with urethane casting gives you the right flex and surface finish. Don't rely on FDM for anything you'll hand to a user for feedback; layer lines and anisotropic strength will bias their perception.
Only if the prototype will be photographed, shown to investors, or used in a pilot run. Vapor smoothing on nylon can seal porosity and improve chemical resistance, but it also changes dimensions slightly. Bead blasting hides layer lines on metal parts but rounds sharp edges. If the part is purely for internal fit checking, skip the finish and spend the money on an extra iteration.
Ask whether they offer bridge tooling or low-volume production in-house. If a shop only does one-off prints, you'll have to re-qualify a new vendor when you need 500 parts. Also check if they can share material data sheets and process control documentation. A prototyping partner that treats your first article like a production part will make the transition much smoother.
They copy the tolerances from a machined metal drawing onto a plastic or elastomer part. Plastics shrink unevenly, absorb moisture, and creep under load, so a ±0.05mm callout on a 3D printed nylon bracket is unrealistic. Work with the shop to define critical-to-function dimensions and leave the rest at standard commercial tolerances. That keeps costs down and avoids endless back-and-forth over irrelevant deviations.
For many standards, you can use prototype parts for preliminary thermal, electrical, or drop tests as long as the material and manufacturing process are documented. You won't get full certification, but you'll catch design flaws before investing in production tooling. For medical or aerospace applications, use the same grade of material you plan to mold or machine, and be honest with the test lab about how the part was made.
Conclusion
Rapid prototyping services succeed or fail on material choices long before a part ever reaches a stress test. Too many teams default to the cheapest resin or softest filament, only to watch a housing crack during a client demo or a snap-fit wear out in a week. The best shops stock engineering-grade options—glass-filled nylon, carbon-fiber PETG, machinable aluminum—and they are upfront about which grades actually survive heat, impact, and repeated assembly. That honesty also shapes turnaround promises. A true 48-hour build is not magic; it means the shop has pre-vetted toolpaths, dedicated machine time, and a queue that will not silently deprioritize your job. You trade away exotic surface finishes or ultra-tight tolerances for speed, but you should never trade away basic dimensional accuracy.
Budget leakage rarely comes from the machining or printing itself. It hides in poorly nested layouts, unnecessary secondary operations, over-specifying tolerances on non-critical holes, and paying for a 3D-printed part that should have been milled from a solid block. The right partner asks whether you need form, fit, or function—not just which process sounds modern. Small design changes, like adding a chamfer to a press-fit boss or avoiding an internal undercut, can save days. And when a prototype finally works, the same partner should hand you files and process notes that let production start without rebuilding everything from scratch. That continuity is what turns a quick idea into a manufacturable product, not just a pretty shelf model.
Contact Us
Contact Person: Joe
Email: [email protected]
Tel/WhatsApp: +8613799507208
Website: https://www.3dprotomat.com/